Style Manager
Overview
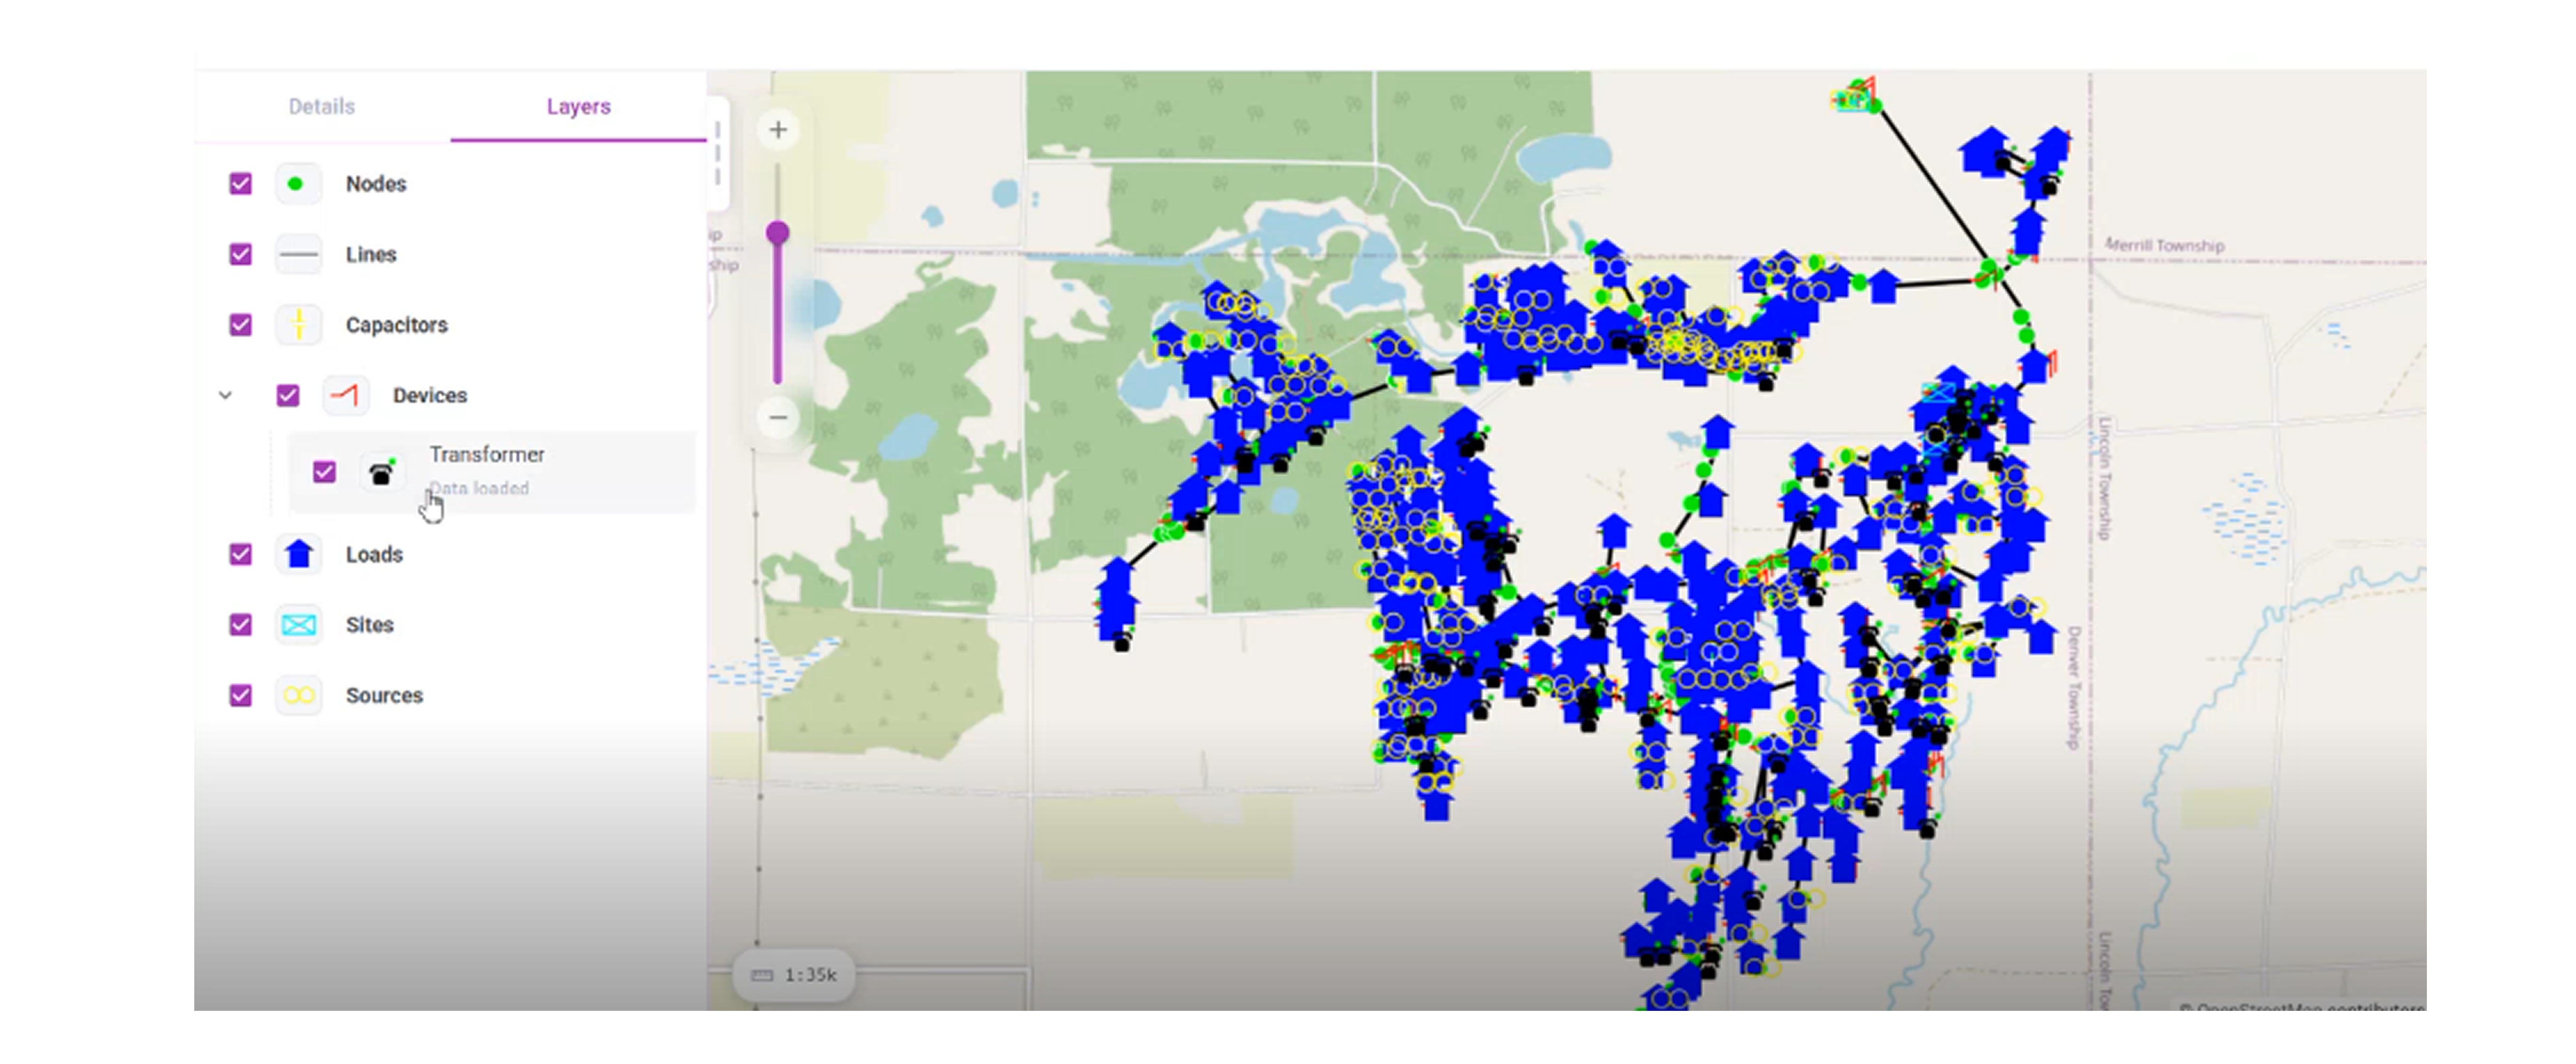
The Style Manager allows users to customize how layers and sublayers appear on the map. You can assign different icons, colors, and sizes for each zoom level, making the visualization clearer and easier to understand.
Prerequisites
- ADMS must be enabled for the project
- Network data must be uploaded
- At least one sublayer must be created
- You must have access to the ADMS module
How to Configure Styles Using Style Manager
Step 1: Open the Style Manager
- Navigate to the ADMS dashboard.
- Click the Style Manager icon in the top-right corner.
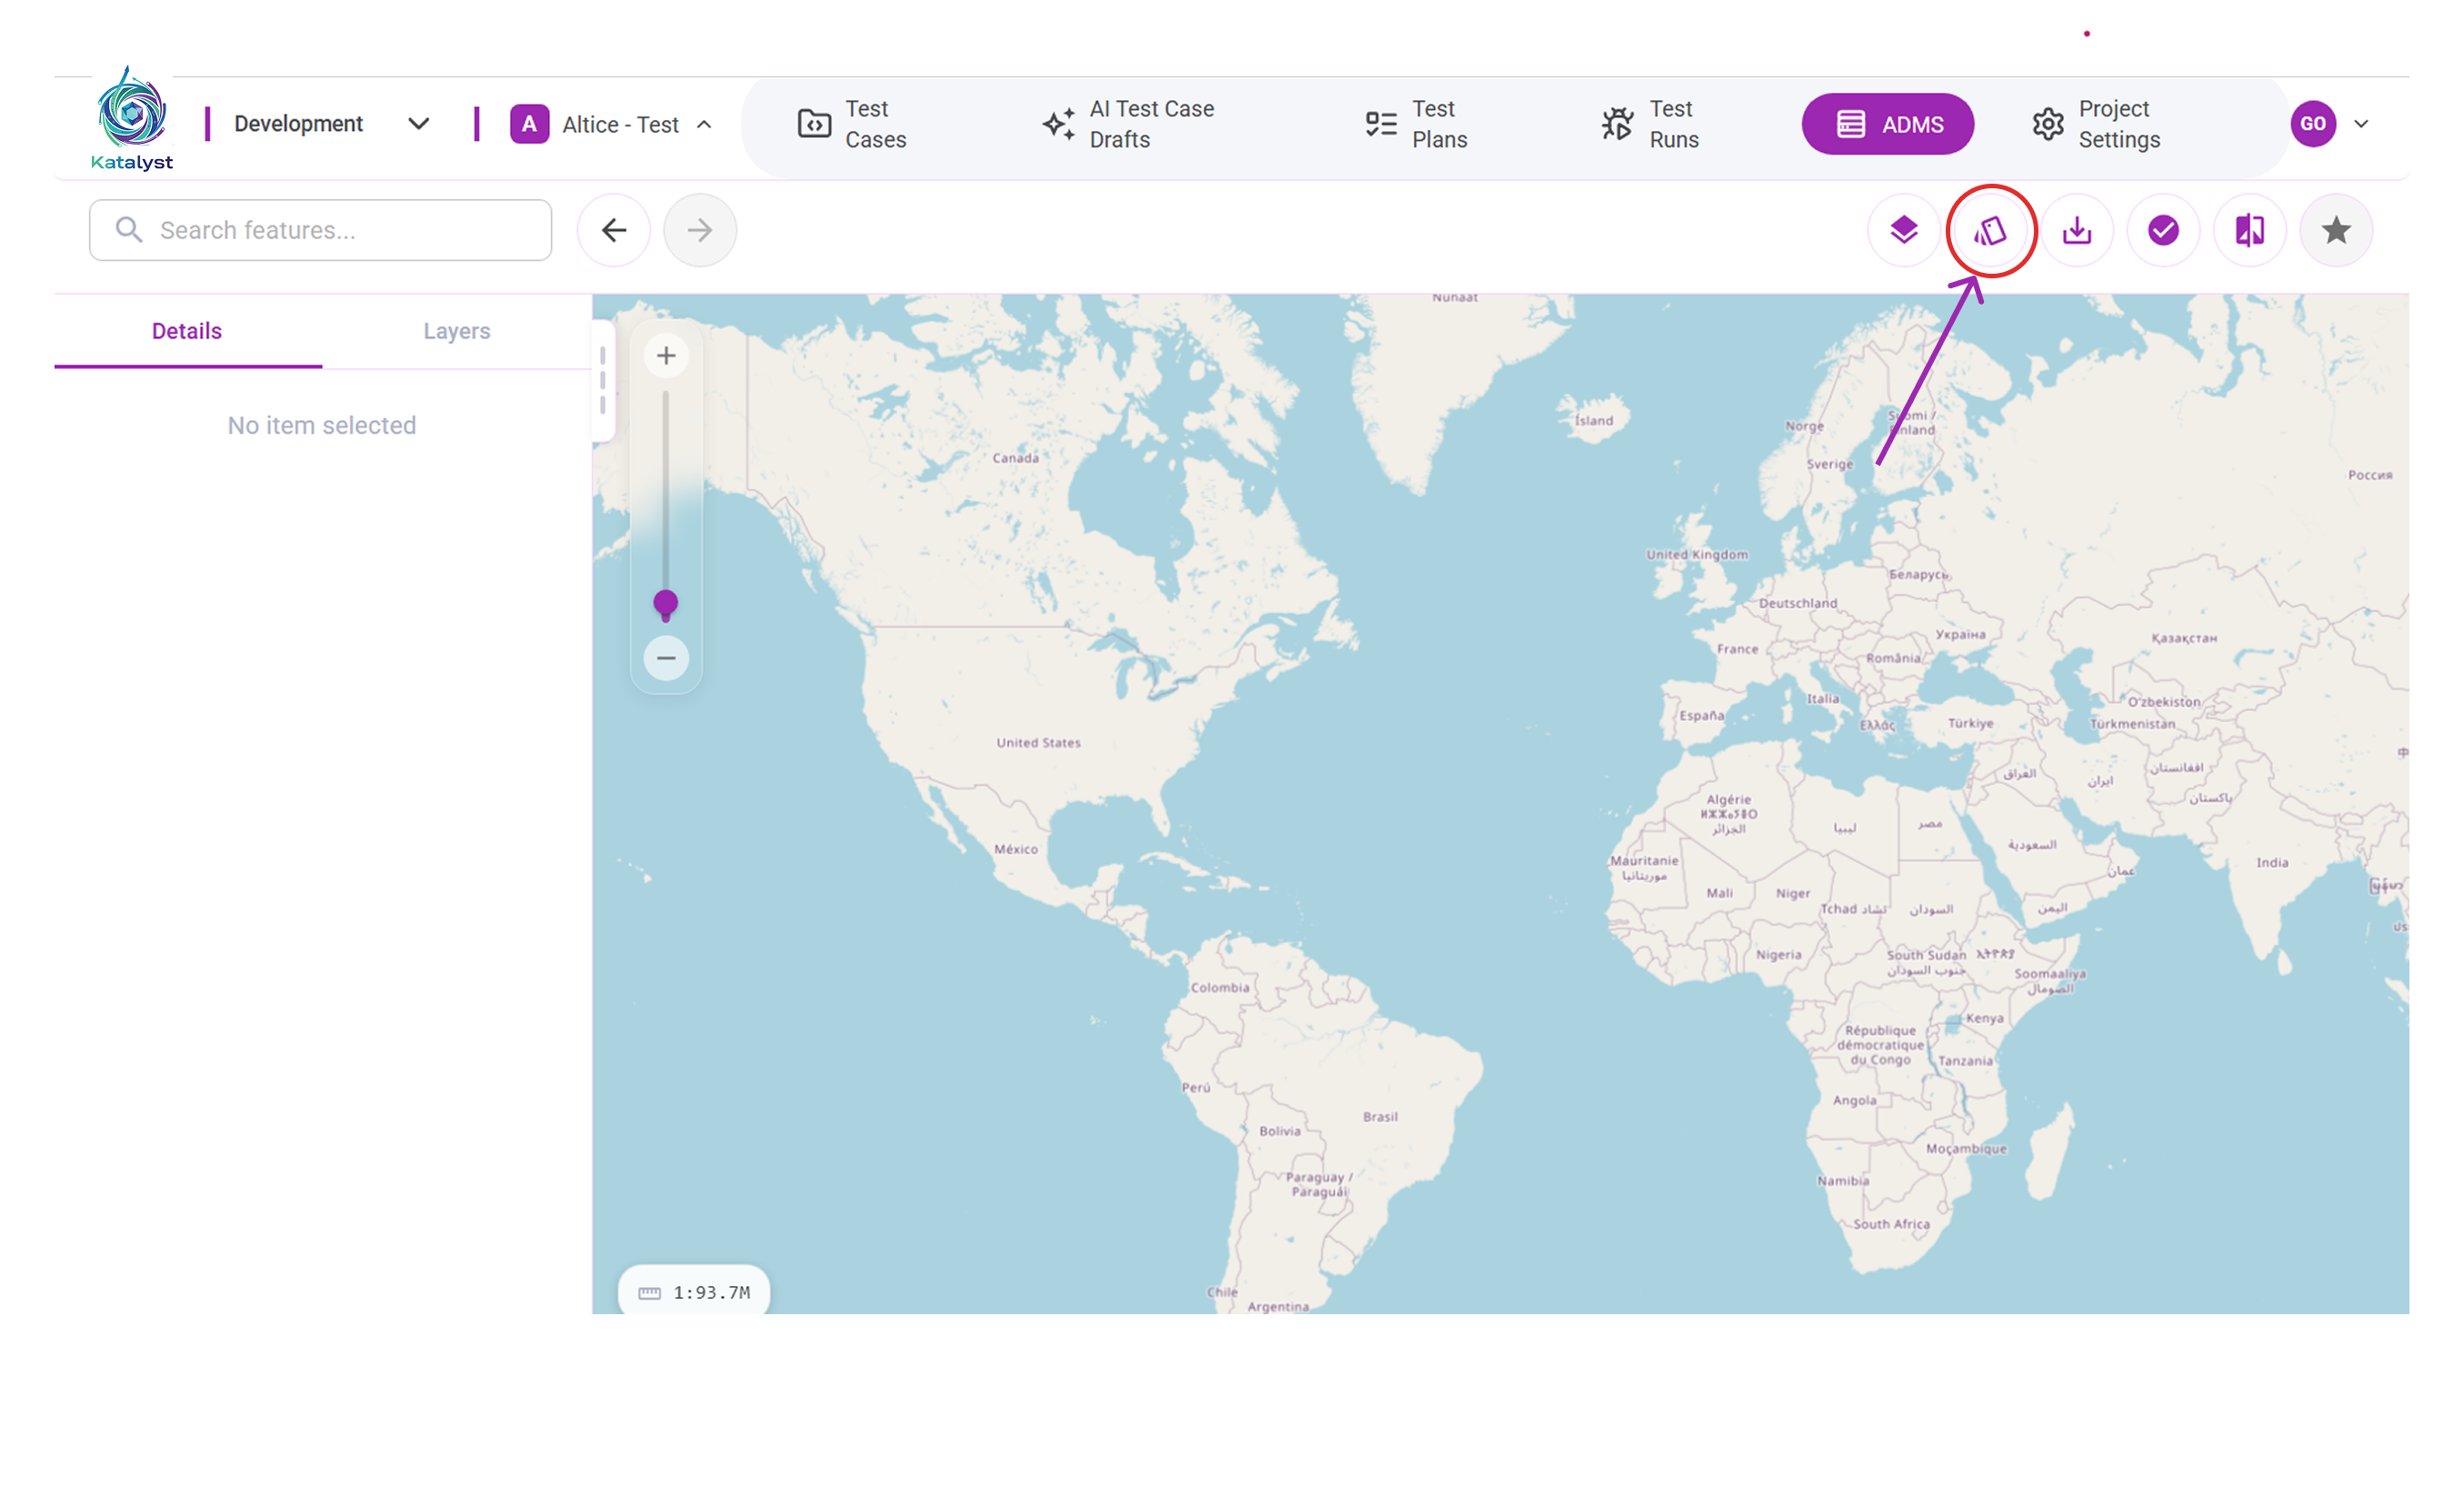
Step 2: Select a Sublayer
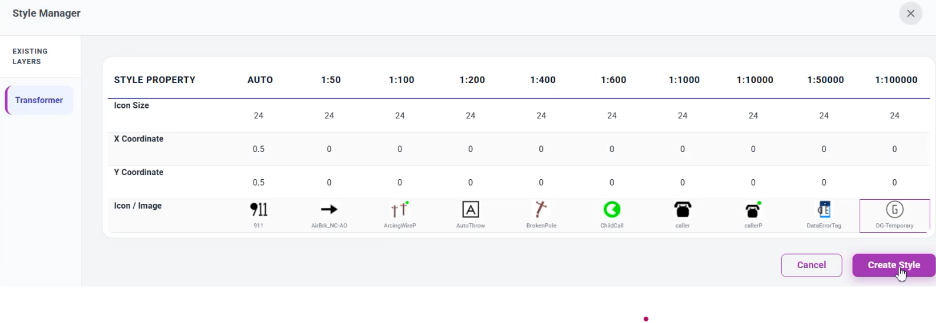
- When the Style Manager window opens, select the sublayer you want to style (for example: Transformer).
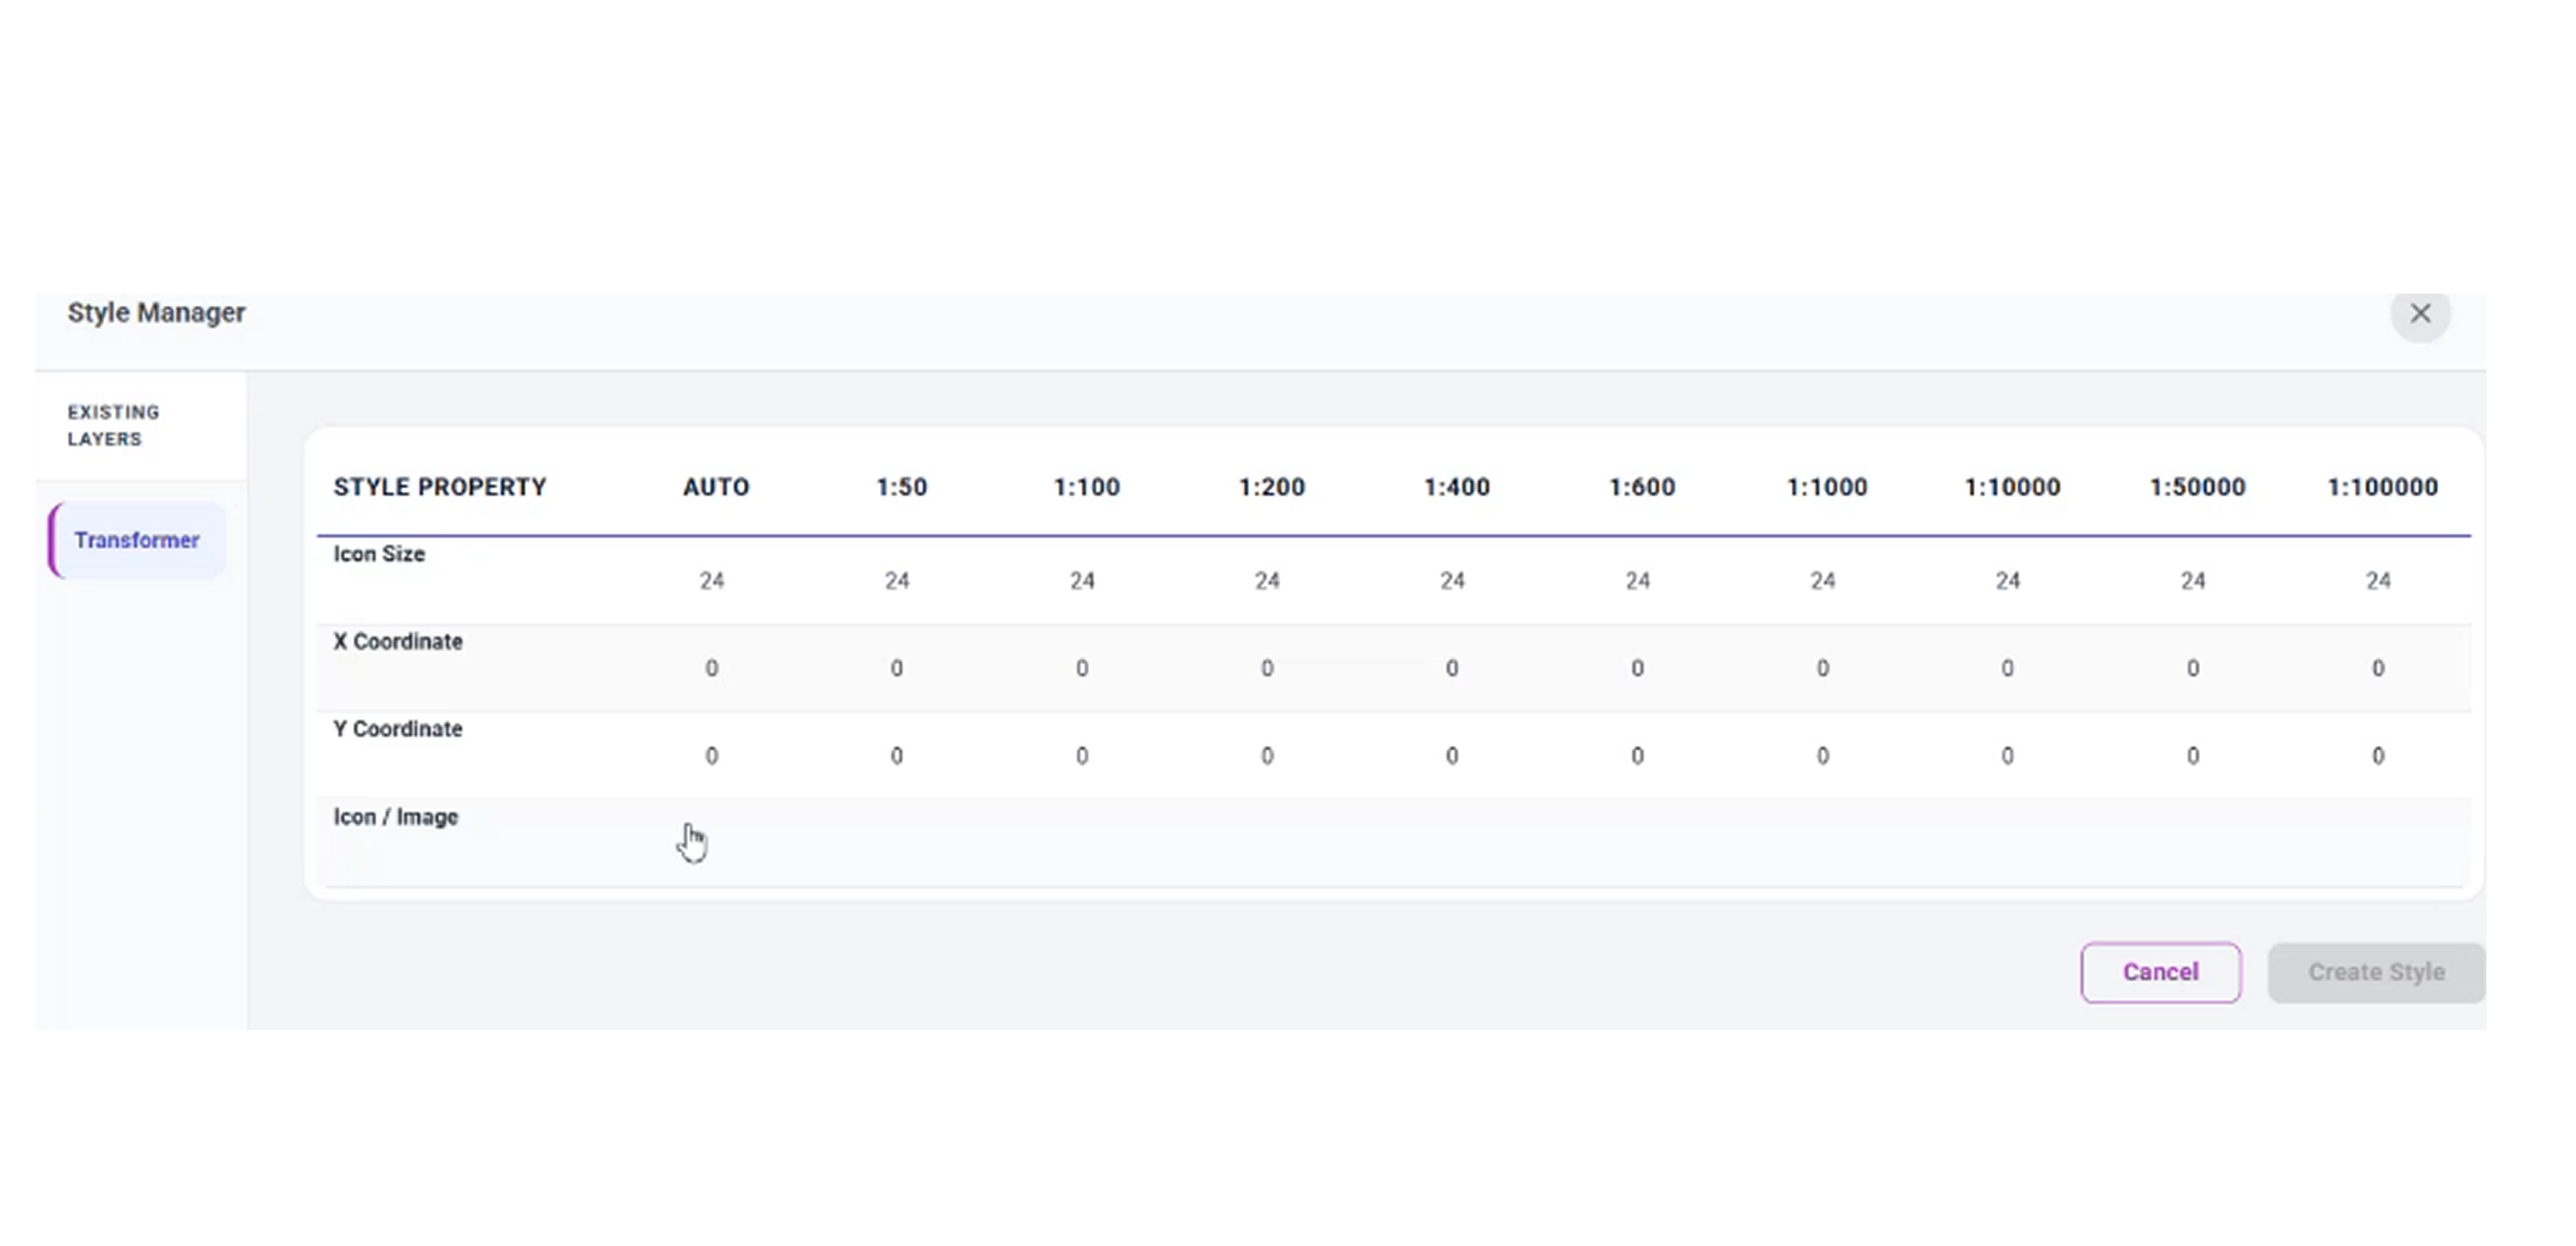
Step 3: Configure Styles by Zoom Level
In the Style Manager, configure how the sublayer appears at different zoom levels
For each zoom scale (Auto, 1:50, 1:100, 1:200, etc.), you can:
- Set Icon Size
- Choose an Icon / Image
- Adjust X and Y coordinates
You can assign different icons to different zoom levels to control how the map appearance changes when zooming.
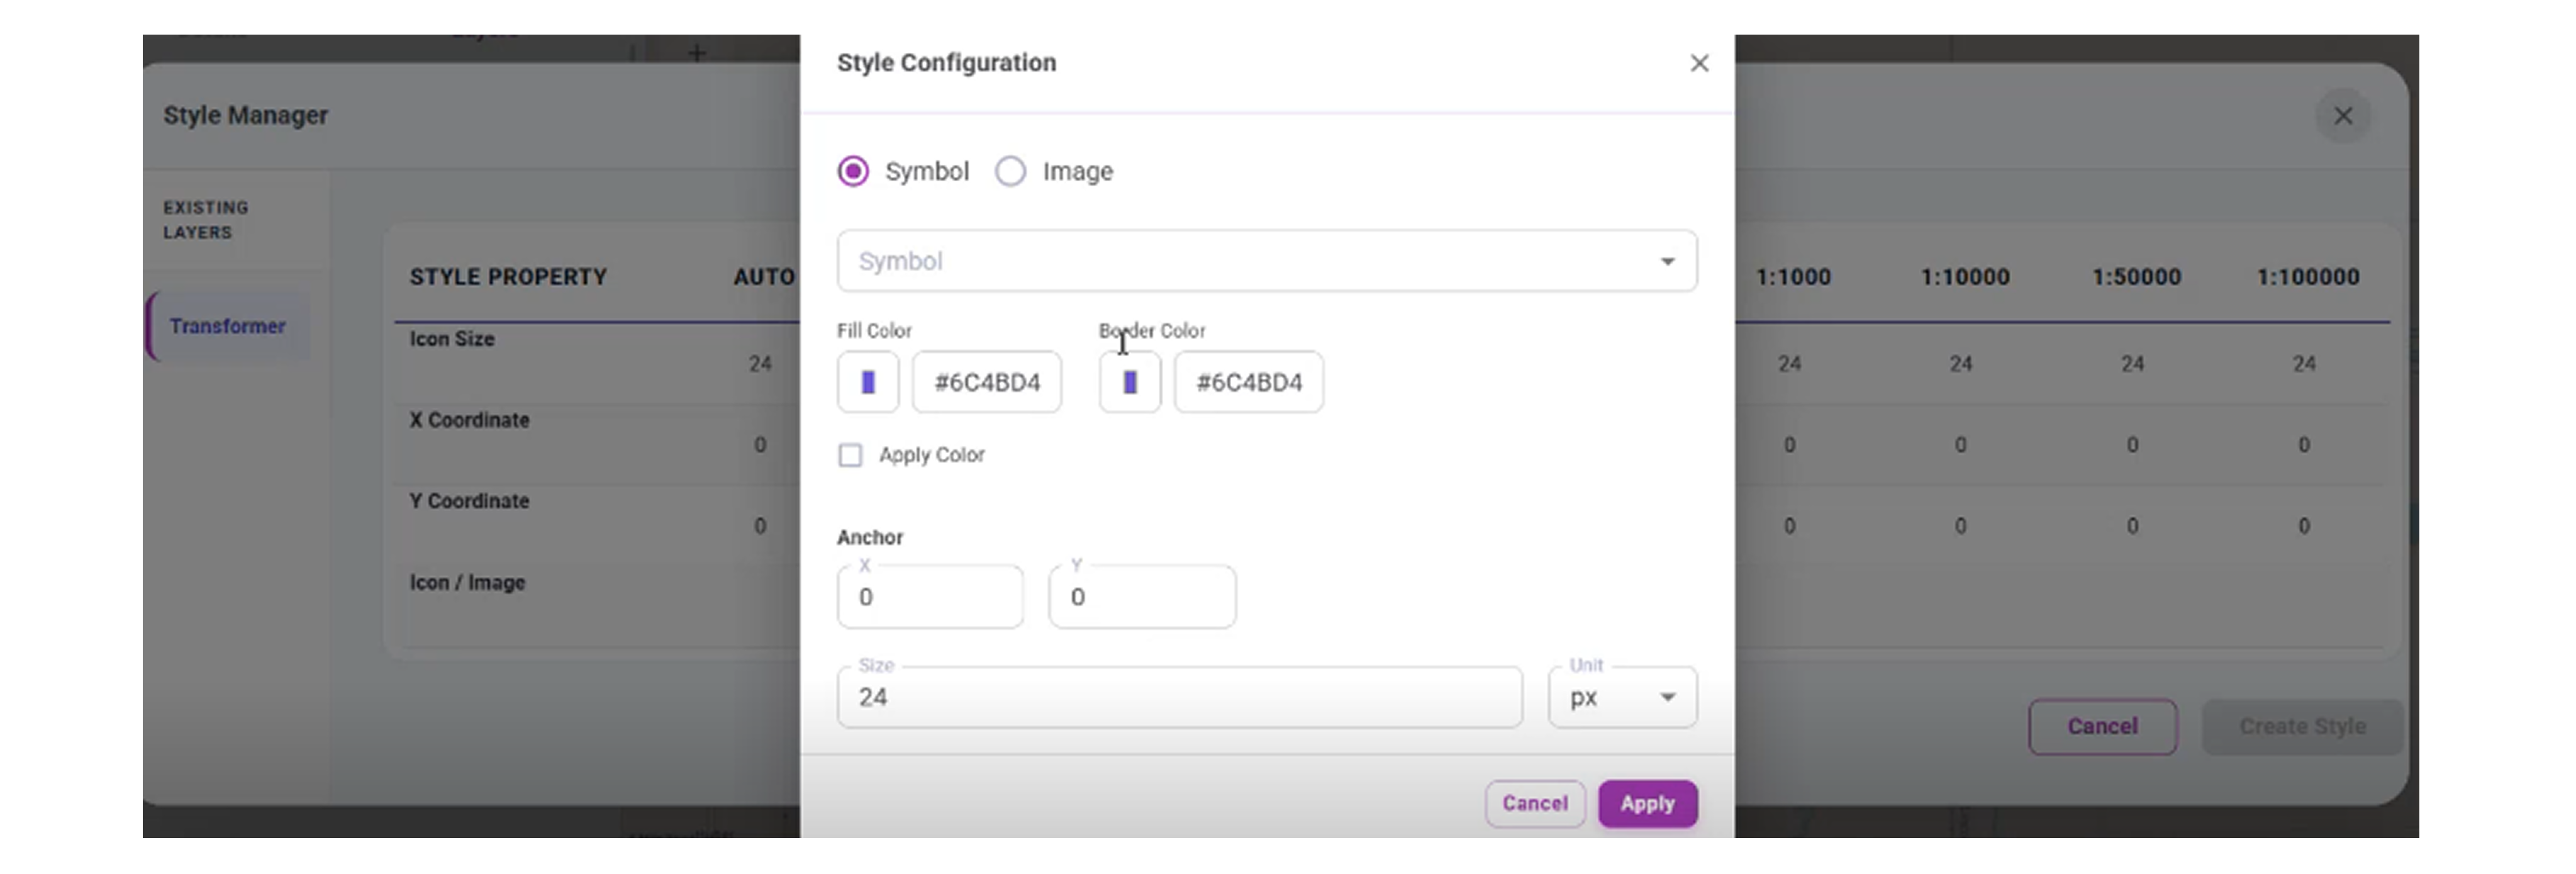
Step 4: Customize the Icon
- Click the Icon / Image field for any zoom level.
- The Style Configuration window opens.
- Choose the style type:
- Symbol
- Image
- Select the icon or logo you want to use.
- Optionally configure:
- Fill color
- Border color
- Anchor (X/Y)
- Size
- Click Apply to save the icon for that zoom level.
Step 5: Save and Apply the Style
- After setting the required styles, click Apply
- Click Create Style
- Refresh the page manually
- Zoom in and out on the map to see the icons change based on zoom level.
 ---
---
Result
- The selected sublayer is displayed with custom icons
- Icons change dynamically based on zoom level
- Map visualization becomes clearer and more meaningful
Notes
- Different icons can be used for different zoom levels
- Styles can be updated at any time
- Refresh is required to apply new styles